CLICK HERE FOR FREE BLOGGER TEMPLATES, LINK BUTTONS AND MORE! »

Friday, November 19, 2010

How Gorgeous is This?


It's a mini book my good friend Ly Le made this holiday season, and it must be seen and touched to really be appreciated! It's made from Teresa Collins' NOEL line along with some amazing hand-made flowers and unique one-of-a-kind embellishments. It's truly breathtaking in the details, and colors and textures feel so rich and expensive.

I'm thinking I need to make one for my Grandmother for Christmas.

Lucky Me!! She's teaching this beauty at several stores in the area, so if you're thinking you need to make one as a gift for someone special (like me!), you're in luck too! Just hop on over to the Lytle Scrapper blog to find out where you can sign up. But you'd better hurry, Ly's classes always fill up quickly, and I wouldn't want to see you miss out!

Thursday, November 11, 2010

NEW! Christmas Banner Class


Banners are all the rage right now...and why not? They're so fun to make, and really there's not an event that wouldn't be complete without one! They make wonderful decorations for just about any occasion...not to mention great gifts!

So join me then, this chilly winter season and together we'll make this super cute "Be Merry" banner to adorn your entry way, fireplace mantle, or wall all December long. We'll use the "Everybody Loves Christmas" line with it's cute little snowmen and whimsical color palette from Echo Park along with some super cute one-of-a-kind embellishments and trims. We'll also learn how to make those popular rosettes you've been seeing everywhere...and then you'll be hooked! You'll be using them on your layouts for years to come, along with gift bags and boxes, handmade cards, and more!

This class is being offered at three stores this holiday season, so you won't be able to miss it!

Irvine
Friday, December 3rd at 6:00pm
(949) 756-2729

Huntington Beach
Sunday, December 5th at 1:00pm
(714) 841-1801

Long Beach
Saturday, December 11th at 10:00am
(562) 377-0302

Friday, October 8, 2010

Halloween Banner Classes!!


Ok, how cute is this halloween banner? It's pretty rare that I finish a project and just LOVE it...but that was the case with this project, and I can't wait to teach it. It's really pretty easy, albiet a little time consuming in the deails...but it's worth every minute!
Need to make one you say? Well, just so happens you're in luck! I will be teaching this little goodie at not one, but two stores very soon! So let's hang out and make this banner that's so cute, it's SCARY! Made using the Maya Road chipboard banner book, and the adorable My Mind's Eye "Blackbird" paper collection, this super sturdy banner is guaranteed to adorn your wall, door or fireplace mantle for years to come. As always, we will enjoy snacks, prizes, and friends! Sign up today while you still can!
Class 1: Scrapbook Daisies in Long Beach
(562) 377-0302
Saturday, October 23rd
10:00am to 1:00 pm
Class 2: The Scrapbook Garden in Huntington Beach
(714) 841-1801
Sunday, October 24th
1:00pm to 4:00pm
Be sure to have the following in your toolkit when you come:
•Craft knife and cutting surface
•Emery board or sanding block
•Scissors
•Dimensional (foam) tape, dots or squares
•Quickie Glue Pen
•Scor Tape or other strong adhesive (liquid works too)
Hope you can make it!


Wednesday, October 6, 2010

Fun Stuff!!

The store opening celebration at Scrapbook Daisies was a great success, and exciting stuff is already scheduled for the remainder of the year! Check out what's up for the rest of the month:


Those of you that weren't able to join me at the Scrapbook Garden for this great little travel mini will be excited to know that I will be teaching it this weekend at Scrapbook Daisies! Class is on Saturday, October 9th from 10-1pm, so join me for some scrappy fun and of course, prizes! Be sure to include the following in your toolkit:

•Emery board or sanding block
•Creamy Brown or Chestnut color chalk ink
•Foam Tape
•Craft knife and cutting surface•
•Tim Holtz mini stapler or regular stapler
•1/8" Scor Tape
•Glue Dots and Liquid Glue
•Xyron "X" Sticker Maker might be helpful if you have one...


And check out this spooky goodness:


Join Lytle Scrapper Ly Le on October 17th from 2-5 PM! You will make a 2-Page Layout using Cosmo Cricket's Haunted Line with stamps by Heidi Swapp and Making Memories. Plus, a Tim Holtz Style Card and two Treatboxes! This kit is loaded with tons ribbon, bling, buttons, brads, and flowers {oh my!}.

Class Supplies List

•Paper TrimmerScissors
•Your Favorite Adhesive
•Glue Dots
•Foam Dots or Tape3L Photo Tape or Terrifically Tacky Tape
•Black Inkpad
•Paper Piercer or Pin
•Black Journaling Pen
•White Journaling Pen

Optional Items: Bone Folder, Scoring Blade, or Score PalCrimping Tool

We're really hoping you can join us for one (or BOTH!) of these great classes. Call the store today to reserve your spot at (562) 377-0302...and join us for a class that's so great...it's SCARY!!

Saturday, September 25, 2010

I probably haven't mentioned it before, but my good friend Martha and her oh so supportive husband Tony are opening a Scrapook Store. It's called Scrapbook Daisies..and yep! You guessed it! It's the same Scrapbook Daisies as the wonderful kit club you've come to know and love.

As of yesterday, they are just ONE week away from the official opening of Scrapbook Daisies' brick and mortar store! Martha and Tony are busy putting in the finishing touches! So join us IN PERSON or ONLINE to help celebrate!

Here is a rundown of the festivities: The store will officially open on Friday, October 1st at 10am and will stay open until Midnight. Join us us for our first official crop night for just $10. The crop room holds 20 so call us at 562-377-0302 to reserve your spot.

The festivities will continue BOTH IN THE STORE AND ONLINE on Saturday, October 2nd with store hours from 10AM to 6PM . Join us AT THE STORE from 12PM to 4PM for cake and make-n-takes by myself and Ly Le of Little Scrapper. Ly will be making a card using Imaginsce paper and I will be hosting a 1-page layout using Prima papers.

Here's the store Info:

Scrapbook Daisies
3962 Studebaker Road #203
Long Beach, CA 90808
562-377-0302
M-Th 10AM-7
PMFri 10AM-Midnight
Sat 10AM-6PM
Sun 12PM-5PM

Can't join us in the store, you say??? For all you Scrapbook Daisies Fans who are not local, join us ONLINE from 10AM to 6PM PST for our Opening Celebration Online Crop! Join our Design Team as we chat on our Message Board and on Facebook with hourly games and prizes, challenges and inspirational layouts, and of course, the play-by-play of what's happening at the store... we will be posting pictures and videos of the store and make-n-takes so that you too can join in on the fun!

You don't want to miss out on the fun!

Hope to see you at the store or online!

Wednesday, September 15, 2010

Calling All Locals:


Check out this cute little mini book I'll be teaching at the Scrapbook Garden on Sunday, September 24th from 1-4pm! This little book is made with chipboard AND acrylic pages and features the gorgeous "Inspired Traveler" line from Creative Imaginations. Along with some super cute coordinating embellishments, this little mini it is also packed with hand cut cork pieces, corrugated cardboard pieces and blingy goodness as well!

Make sure to have the following in your toolkit when you come:

•Creamy Brown or Chestnut color chalk ink
•Foam Tape
•Craft Knife and Cutting Surface
•Tim Holtz mini stapler or regular stapler
•1/8" Scor Tape
•Glue Dots and Liquid Glue
•Xyron "X" Sticker Maker might be helpful if you have one...


Hope to see you there for some scrappy fun, as well as snacks and prizes!!

Saturday, August 7, 2010

My Favorite Girl

I honestly can't remember the last time I scrapped just for the fun of it. It seems I'm always working on an upcoming class, a page kit to sell, or design team assignments with restrictions and deadlines.

Then, last week I was surfing the net and noticed the Pagemaps blog was having a contest..and get this...the prize was a new kit featuring the "Life is Good" line from Echo park...stinkin adorable! I have to have it. That motivation in combination with the totally awesome sketch inspired me to scrap this layout with my Dear Lizzy Kit from SD4U (thanks Pattycakes!).

Here's what I came up with:


Thanks Pagemaps and Scrap Attack Scrapbooking for the chance to win!


Monday, August 2, 2010

Another Date Added!


I have great news for those of you that won't be able to make the "Sweet Summer" mini book class on August 14th! Why not follow me over to Custom Impressions Scrapbooking in Bellflower on August 21st? C.I. is a great little store I discovered with the help of my good friend Martha (yes...the same Martha of SD4U fame!) conveniently located just off the 91 fwy at Bellflower. The owners Teresa and Diana are super sweet (and talented!), and the store is packed with some of the latest and greatest paper lines and embellishments. And you'll get 10% off your purchase when you take a class! And as always, we'll enjoy some yummy snacks and great prizes while we hang out and make something cute!! Call the store today to reserve your spot at (562) 925-5927.


Hope to see you there!

Saturday, July 17, 2010

Another Class!


Join me in creating this super summery mini album using an adorable little canvas binder from Maya Road along with October Afternoon's "Fly A Kite" paper collection. In this fun class you will actually hand sew and stuff this cute little bird onto your album's canvas cover! Inside your book is 8 chipboard pages that hold 8 photos, plus 2 cute little canvas pockets to hold special memorbilia. Also included in the class kit is an entire Mini Market alphabet sticker set to customize your book with your special event or liking.

Call the store today to reserve your spot!

Where: The Scrapbook Garden, 714-841-1801
When: Saturday, August 14th from 2:00 to 6:00 pm''

In addition to your basic tool kit, you will need to bring the following supplies:

•Cat's Eye Creamy Brown chalk ink or equivalent (SEI=Capuccino, Tsukeniko=Sahara Sand)
•Foam tape, dots or squares
•Crop-a-dile
•Corner rounder
•Heavy duty emery board for sanding
•Liquid fabric glue (Fabri-Tac, Helmar's, Beacon's, etc.)

See you there!!


Monday, May 10, 2010

Finally...A New Class!


HEY LOCALS!!
What are you doing on Saturday, May 22nd at ohhh....say around 2:00pm? Why not join me in creating this cheerful mini book using the Pinecone Press Flap Book album and the adorable Jack and Jill line from My Mind's Eye at the Scrapbook Garden? This mini book has 6 tri-fold pages and spots for over 15 of your favorite springtime photos! Use the title "So Tweet" like the sample, or create your own title using the Creative Imaginations glitter-foam alphabet included in your kit. As always we will enjoy great company, snacks and prizes!
Call Melissa @ (714) 841-1801 to reserve your spot today...before the class sells out!
And be sure to include a stapler and plenty of foam tape in your tool kit :)

Friday, May 7, 2010

SD4U May Kit: Thrift Shop!

October Afternoon is arguably my favorite paper manufacturer...and the Thrift Shop line in the May Kit has got to be my all time favorite collection from them! Something about the this particular color combination mixed with cream and black along with the nostalgic patterns and accents just really grabs me!

Once I got started on my layouts, I really had to force myself to stop at night! One idea kept leading to another, and I was able to finish 4 layouts and a card this week alone:


Play: This layout features that super cute nephew of mine, and was the first layout I finished. I think I subconsciously went with this patchwork design because I wanted to use ALL of the paper, and as LITTLE of the paper as possible at the same time...LOL. I try not to, but I can certainly be as guily of hoarding beautiful paper as the next guy! I cut this title using the Cricut and Simply Sweet Cart...love this font!


Before She Was Mom: This nostalgic paper line was screaming for me to use some older, black and white photos, and this was the result. I cut the "collectors item" pattern into this scalloped border for the top and bottom, and I love how it ended up looking just like old fashioned lace. Note: I will be posting a tutorial of the fabric flower for this layout in the class/tutorial forum over the weekend!


Celebrate: Some of you will recognize my good friend Alice here celebrating her birthday with her favortie people...Minnie Mouse and Pluto. I kept this layout pretty simple, since the photos have a lot going on in them. And I just noticed, I forgot to add the date in my journaling circle...'doh! Gotta remember to go do that right away...


Still My Baby: I think this is my favorite of the bunch. The more colorful patterns just POP right off the black and cream paper background. For a little extra femininity, I accented the flower stickers with some red glitter and rhinestones and pearls....then staggered the cluster dimensionally with pop dots. And all you moms out there will agree...no matter how old they get, they're always your babies...right? My "Baby" turned 23 this year!


And here's something I threw together with my scraps...because you KNOW that paper is just too cute to throw even the smallest scrap away:It's just a little 4"x4" note card that took just a minute to throw together. Aren't those OA letter stickers ADORABLE? They're just like the little MM ones, only bigger, and I LOVE them...they are the perfect size...not to small and not too big. Perfect for sub-titles and card sentiments.

Thanks for taking a peek at my projects, and if you've decided you NEED one of these delightful kits for your own, pop on over to SD4U and order yours quick, before they're all gone! You won't be disappointed!

Thursday, April 15, 2010


It's that time again...Reflections is just around the corner, and I'm so excited to announce that I will be representing the Scrapbook Garden at their Isle Carnivale Make & Take event at the Hyatt Regency in Newport beach on Friday, April 30th!

For those of you that aren't familiar, Reflections is a top-notch scrapbooking retreat that offers tons of classes taught by the industry's most talented designers. The Isle Carnivale Make & Take night however, along with a vendor faire, is open to the public as was as registered attendees of the retreat.

Here's a little peek at what we'll make:
It's a one page birthday layout featuring the latest and greatest from Creative Imaginations! To see the whole thing....or better yet make one of your own...you'll have to stop by my booth between 7:00 and 10:00 and say hello!

For more information on this awesome retreat and all it's exciting events, contact Scrapbook Oasis at (949) 756-2729 or visit the website by clicking the link above. I hope you can make it, it's going to be such fun!

Monday, April 12, 2010

SD4U April Kit: April Showers

This "Quite Contrary" line from My Mind's Eye was the line I saw at CHA winter that really, really struck me and let me tell you, I was beyond excited that when I found out I would be designing with it this month! I mean seriously, is there a paper line that screams my name any louder? I don't think so! If you know me at all, you know I love me some bright, bright colors! And of course, pair the above mentioned paper line with an entire jar of matching Prima flowers, some blingy-bling and matching ribbon, and you KNOW I'm in heaven!


Here's what was inspired by this fabulous kit:


My Favorite Thing: Of course that would be my little nephew Clayton! I built this layout on a sheet of white cardstock from my stash...and for a little extra fun, I filled in the letters of the word "favorite" from the cardstock title block with quickie glue and sprinkled on some red glitter. I even busted out the "swiss dots" cuttlebug folder for the yellow circle here...it added just the right touch to an otherwise boring cardstock circle :)


Happy Bird Day: My Friend Patty is such a nut...'nuff said about that! Here, I used my new Martha Stewart punch for the first time on the vertical yellow cardstock strip, and I just LOVE it...isn't it fun? I also couldn't resist adding a little "googly" eye from my stash onto the cardstock bird in the kit...it just totally added a little character!


Life Is Good: I just love the title blocks that come with this kit...it's nice to have a title premade for a change...it frees up time to do other stuff, like layer flowers and make ribbon leaves! The flower centers here are from my stash...I'm not exaggerating when I say I think I've had these corduroy brads for at least 6 or 7 years!


Hello Card: Putting that cuttlebug to good use again! And I just love the little stamp set that came in the kit! For my sentiment here, I stamped the little bracket shape onto white cardstock, stamped my sentiment inside and mounted it to the front of the card with foam tape after trimming it...simple and adorable!


In other news, I'm working on something pretty exciting and should be able to share with you very soon! Stay tuned...


Saturday, March 27, 2010

Happy Bee Day


Join me in wishing my dear friend Patty a Happy Belated Birthday, won't you? She's the bee's knees, for sure :)

Saturday, March 13, 2010

Sing it with me...

Everybody's liiii-ving in a material world, and I am a material girl....mateeeriaaa-uuhl!

Well, I am this month at least, because I've been working with SD4U' "Material Girl" March kit featuring Cosmo Cricut's whimsical, bright, sewing-inspired line. Check this beauty out:


Martha's done it again...another fantastic, stuffed-to-the-brim, perfectly coordinated kit filled with the latest and the greatest everything! Here's what I've been up to with it:

Sweet: I was so excited to see a whole bottle of gorgeous coral colored Shimmerz in my kit and busted it out first thing! For the background on this layout I used the lace paper in the kit as a mask and sprayed my Shimmerz over it onto the background cardstock to create a subtle pattern on the left side of the page...I totally love this understated effect, and it was so simple!

She's Crafty: There's that song title obsession thing again...I just can't help myself! These photos are of my most favorite scrappy goodies, and what fun it was to do a layout about them. You can see a step-by-step tutorial of how I put this layout together on the SD4U Message Board in the Class/Tutorial Forum.

Sew...How've You Been?: Just a quick little card I put together for a challenge over on the message board...are you up for it? The challenge is to simply alter any pre-made alphabet. Here I inked my cream colored foam Thickers with a coral chalk ink, then added Diamond Stickles and totally changed the whole look of my alphabet stickers.


Sew Adorable: Nope, I just couldn't resist the play on words for my title! These photos are of my daughter Ashley when she was about 4 years old (almost 19 years ago!!!) Aren't all those little chipboard sewing embellies so much fun? That chipboard needle and thread just kill me! I added a little detail to mine with my Stardust gel pen, and the silver just shimmers in real life!


Cute as a Button: On this layout, I strung all the chipboard buttons together from my kit, then attached them using foam tape to create this fun little border. I also sprayed the title letters with my coral Shimmerz...and although I worried at first that the color wouldn't stick to the foam texture...it did eventually dry and work like a charm.


Thanks for popping by! And if you find yourself home and looking fora little inspiration and motivation next weekend, why not join us over at SD4U for our 2nd Annual Birthday Party Crop? As always, there will be lots of challenges, games and plenty of prizes to be won! Hope to see you there!!


Thursday, March 4, 2010

A New Class and a New, Ahead of the game "Me" (maybe).

Those of you that know me well are wondering what's up...aren't you? An upcoming class already posted with a sample in the store an ENTIRE month before it's scheduled date? I can hear you thinking to yourselves..."who ARE you and what have you done with our favorite (wishful thinking?) albiet scatterbrained and obsessively procrastinistic instructor."

Well, rest asured that those endearing personality traits will never completely leave me (I mean...I am who I am, right?) I am trying something new this year. It's called getting organized dispite the gazillion other personal things I have going on in the chaos I call my life. A challenge to say the least, but I figured I had to give it a shot if I hope to hold on to the sliver of sanity I have left these days. Plus, I really need to get serious this year if I want to expect to ever make a profit at this teaching thing...which I do. I mean, I really do.

So here's what's on the horizon:


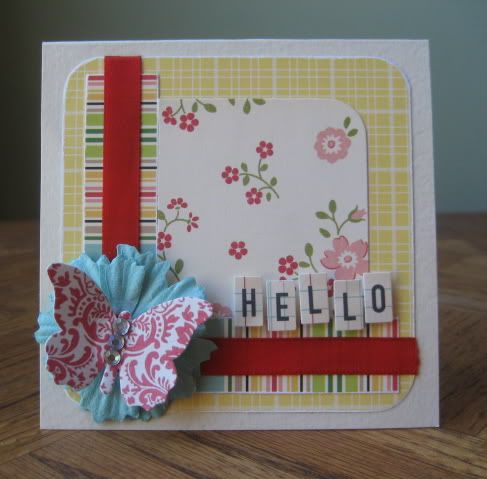
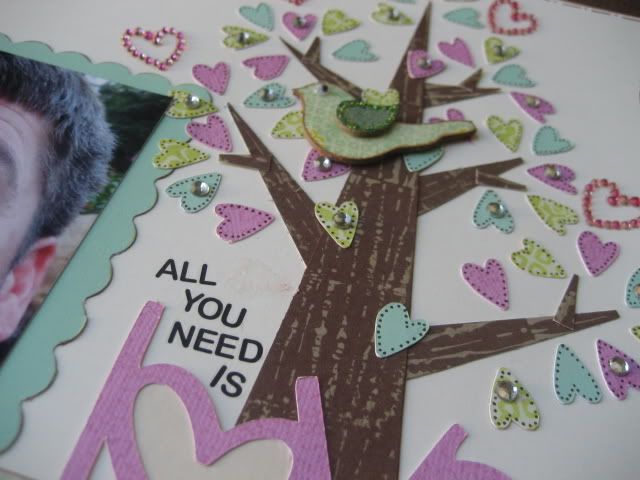
It's a two page birthday layout plus a matching birthday card featuring the "Big Top Birthday" line from Creative Imaginations. I just love it's bright colors and whimsical patterns...and that Maya Road chipboard banner on the front of the card...isn't it just sooooooooooo cute?

Class will be at the Scrapbook Garden on Saturday, March 27th at 2:00. If you decide to join me, be sure to bring a black detail pen, foam tape, and a foam paint brush in addition to your regular tool kit. As always, we'll have snacks and prizes and spend the day making a mess with some cool chicks!

And if that news wasn't unbelievable enough, you may want to sit down for this next announcement.

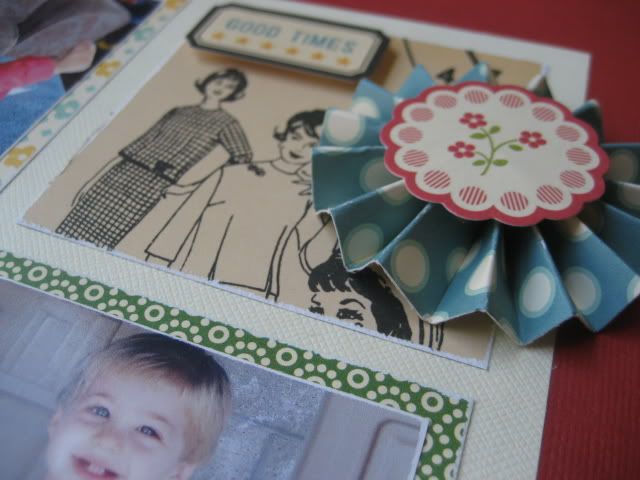
I'm already knee deep in this box I got from MME:

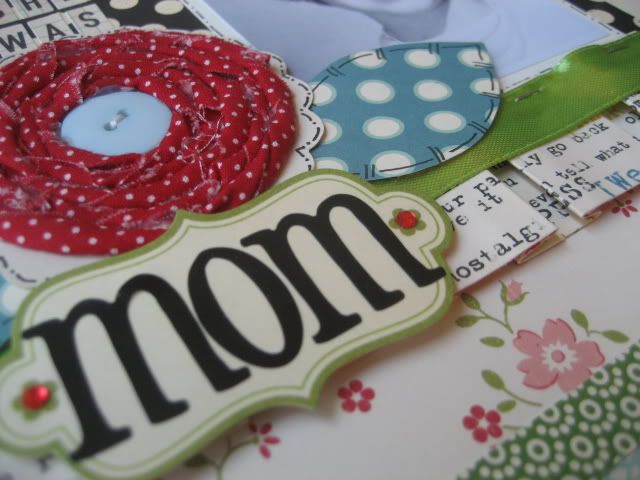
And....you guessed it....I'm designing a mini for Mother's Day! Yes....Already!

Ok, that's probably more than your heart can take in one day. I understand if you need to go rest now. Hope to see you at the Garden!
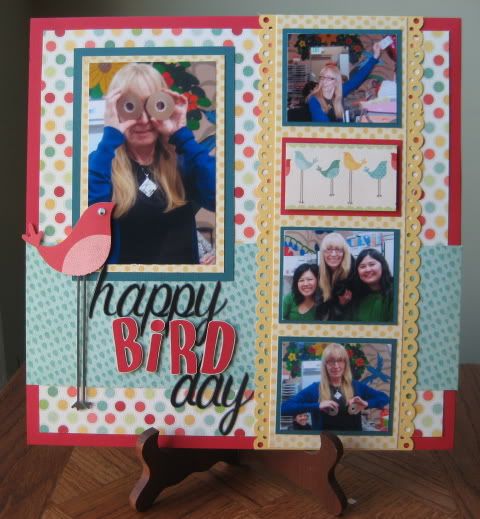
Saturday, February 13, 2010

Love is in the air...

I made this for the Scrapbook Deals 4U Valentines Day weekend crop:


The challenge is to use a Love Song as the inspiration and title for a layout. The paper is from the new Jocelyn line by SEI and I love these colors together for a Valentine's project! I hand cut the tree, then cut a ton of little hearts and the title from the Simply Sweet cartridge on the Cricut. I can't tell you where I got the heart shaped bling, it's been in my stash for ages! But I can tell you that the large swirly bling is from Prima, and the photo is of Hector and I jacuzzing in Costa Rica a couple years ago...isn't it funny? His face really isn't that big in person, I swear!

So anyway, if you're not doing anything this weekend, you should totally come over to the message board and join in the fun! There are tons of challenges and prizes to be won, and more inspiration that you could possibly need!

See you there!

Friday, February 12, 2010

SD4U February Kit Projects

Basic Grey...you gotta love it! But as much as the papers in this "Origins" kit are beautiful, the embellishments included are a blingy dream! Glittered and blinged rubon flourishes and butterflies, layered & glittered stickers, fuzzy woolies...all SO much fun to play with without a huge mess!
Here's what I've done with this gorgeous kit:


Watch Me Grow: Admittedly, I am paper-folding challenged. I try to make those cute spiral-y flowers that are so popular right now, and end up with something that loosely resembles oatmeal. *sigh* But I see those cute pleated paper strips on layouts everywhere, and I love the texture it adds, so I decided to throw caution to the wind and give it my best shot for this layout! I will admit, though, I did measure and use my ruler and scoring blade, because I'm OCD like that :P And in the end, I'm so glad I did and am pretty dang proud of myself! The little fabric tree here was a freebie I picked up at CHA, but you could easily cut your own with some brown and green paper...there's plenty of it in this fabulous kit!


Ashley: This was such a fun layout to make! Check out my step-by-step in the class/tutorial forum on the SD4U message board to learn how I put it together, and made the hand-cut flower.


Do What You Love: For my Grandmother and I, that's travelling! In the kit, there's this gorgeous butterfly rubon, and I wanted it to really stand out on my page and hang off the title block...so I rubbed it onto a scrap of brown cardstock, trimmed around it, and outlined it with platinum stickles and BOOM! It just flew right off the page. I cut the title block from the Home Decor cartrige for the Cricut.


Kitty Love: Oh, the flowers in this kit are so much fun to play with! On this layout I had a blast adding stickles and buttons and popping them up with foam dots. I cut the swirlies underneath with my Cricut and (again) Home Decor cart.


And Finally, a thank you card. I should send this to Martha for the awesome February kit!

Wednesday, February 3, 2010

Valentine's Day Crop!


Have you heard?

Scrapbook Deals 4 U will be hosting a super fun online crop over Valentine's Day weekend! There will be several awesome games, challenges, contests, giveaways and prizes!

The Grand Prize?? A design team spot for 3 months! How awesome is THAT?

Martha and her design team are currently working on getting all of the plans in place...more details will be coming soon, so keep your eyes peeled!

Saturday, January 30, 2010

Greetings from Clayton!

This one's for the family...

Isn't he just as cute as a bug's ear? Growing and learning everyday, and so much fun to be around. I'm so lucky to get to spend time with him every week...he really is the light of my life! He is obsessed with his cars and trucks, can't be bothered to eat much, and says at least 25 words or so. And check out those two teeth...finally!

xoxo,

Auntie and Clayton :)

Thursday, January 21, 2010

SD4U January Kit Projects

If I'm being 100% honest, ME + MASCULINE paper = Total Panic!

I like a lot of it....it's pretty cool for the most part, sure, but give me some to scrap with and I get brain freeze...!! What? No flowers, hearts, cute little owls and NO pink? Oh NO!

So needless to say, when I first opened the Urban Ink kit, I was super intimidated. But after I found a few cute sketches and started cutting it all up, I was amazed how much easier these layouts came together than I expected! The patterns made the paper selections easy, and the colors look so great together, I totally ended up loving this line!


Unique: These photos belong to a friend of mine...they are photos her daughters gave her of themseles as a Christmas gift (what a cool idea!). I borrowed them because I wanted to do a layout that featured girls instead of boys, to show just how versatle this kit can really be. Aren't these awesome photos...grungy and edgy and perfect with this paper and those barbed wire rubons! Thanks Linda (and Kathy)!


100% Boy: I fell in love with the WRMK foil border sticker roll in this kit...totally adorable and easy to apply...not too sticky, but sticky enough! I covered the large chipboard star with some paper from the kit, sanded the edges, and backed it with another pattern...I love how it became a catch-all for embellishments and the epoxy sticker title.


My Handsome Hubby: These are a few of my favorite photos of my hubs. I cut the scalloped border with my apron lace punch (yep! still loving that thing!). "Handsome" is cut from Plantin and "My" & "hubby" are cut from my NEW Don Juan cartridge on my cricut, I just love that font! Instead of covering or painting the chipboard stars on this, I simply sprayed them with gold glimmer mist...fast and easy!


Read to Me: This is based on sketch #105 at Sketch Inspiration...their sketches are awesome and make getting started so much easier! The chipboard stars on this one were painted with a light blue acrylic paint, then inked with a combination of chesnut and charcoal. I love the versatility of chipboard, and how you can get so many different looks depending on the media you use. That's what scrapping is REALLY all about for me...getting messy and having fun!

Thanks for taking a peek, and please don't forget to share what you do with YOUR fabulous January kit over on the SD4U Message board...whichever one you chose! You could even win a prize :)